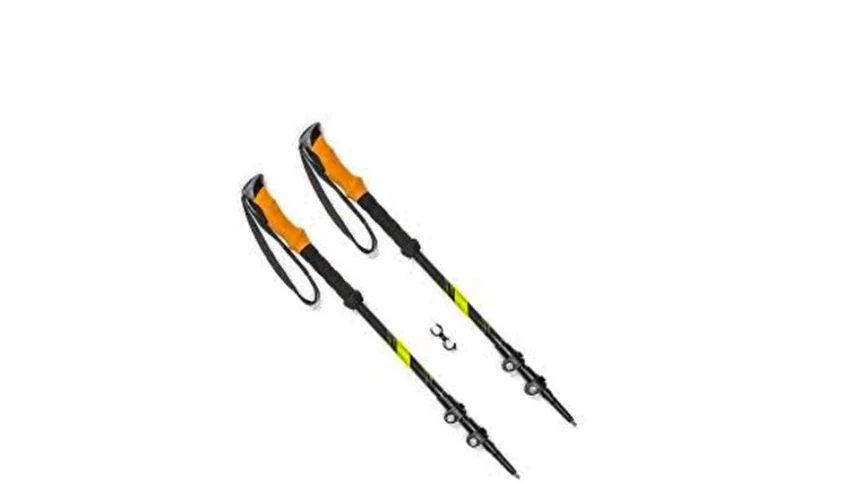
Have you ever thought about how a simple pair of trekking poles could totally change the way you hike? Imagine this: you’re on a tough trail, with uneven ground stretching ahead. Every step makes your legs tired, your knees hurt from the impact, and you struggle to keep your balance. Now picture the same trail, but this time you’re holding trekking poles. Suddenly, every step feels easier. You balance better, and those steep climbs? They feel way more doable.
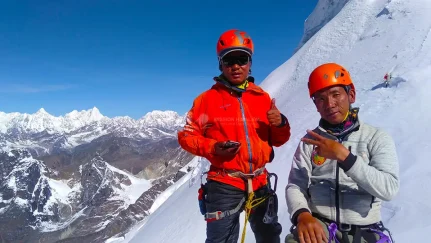
Trekking poles aren’t just cool gadgets; they’re super helpful tools for all kinds of hikers. Whether you’re taking short walks on local trails, trekking to Everest base camp, Annapurna circuit or climbing steep mountain paths, the right trekking poles can make a big difference.
In this guide, we’ll help you understand everything about trekking poles so you can choose the best ones for your adventures. We’ll talk about key features like materials and length, and we’ll explain how things like shock absorption can make your hikes better.
Why Trekking Poles Are Important
If you’ve ever wondered if trekking poles are worth buying, the answer is yes! They do way more than just help you walk—they make hiking safer and more enjoyable.
Here’s why they’re a must-have:
- Better Balance and Stability: When you’re walking on rocky trails or crossing streams, trekking poles give you extra support. It’s like having a steady hand to help you out.
- Less Stress on Your Joints: With trekking poles, your arms and upper body help share the impact of each step. This means your knees and ankles don’t have to work as hard, especially when walking downhill.
- Faster Hiking: Since the weight is spread out, you can walk longer and faster without feeling as tired.
- Full-Body Workout: Using trekking poles makes your arms, shoulders, and core muscles work too, turning your hike into a full-body exercise.
What You’ll Learn in This Guide
Here’s what this guide will teach you:
- The important things to think about when picking trekking poles, like material, length, and grip types.
- A look at the best trekking pole brands and models for different kinds of hiking.
- How to use trekking poles the right way so you get the most out of them.
Whether you’re an experienced hiker or buying your first set of trekking poles, this guide will help you make the best choice. By the end, you’ll feel ready to pick the perfect trekking poles for your adventures.
Let’s get started and find the trekking poles that will make hiking even more fun for you!
Key Things to Think About When Choosing Trekking Poles
Material: The Heart of Your Trekking Poles
The material of trekking poles matters a lot because it affects how they feel to use, how long they last, and how much they cost. Let’s look at the main materials used for trekking poles and what makes each one special.
Aluminum Trekking Poles
Aluminum is a popular choice for trekking poles because it’s strong and affordable.
Pros:
- Durable: These poles can handle rough trails and tough weather without breaking easily.
- Affordable: They cost less than poles made from other materials.
- Flexible: If they bend under heavy pressure, they don’t break easily. This can be helpful on tricky trails.
Cons:
- Heavier: Aluminum poles weigh more than other types, which might make your arms feel tired on long hikes.
- Cold to Touch: In cold weather, aluminum poles can feel icy unless they have foam or cork grips.
- Best For: People who are new to hiking, don’t want to spend too much money, or often hike on rough terrain.
Carbon Fiber Trekking Poles
These poles are lightweight and perfect for hikers who want high performance.
Pros:
- Super Light: Carbon fiber poles are easy to carry, which is great for long hikes.
- Shock Absorption: They reduce the vibrations from the ground, so your wrists and arms don’t get as tired.
- Stylish Look: Many hikers like how sleek and modern these poles look.
Cons:
- Fragile: While strong, carbon fiber can break if it gets stuck between rocks or takes a heavy hit.
- Expensive: These poles usually cost more than aluminum ones, which might not work for everyone’s budget.
- Best For: Hikers who go on long trails, pack light, or want comfort even if it costs more.
Steel Trekking Poles
Steel poles aren’t as common, but they’re great for heavy-duty hiking because of their strength.
Pros:
- Super Strong: Steel poles can handle a lot of force, making them nearly impossible to break.
- Very Stable: The extra weight makes them a good choice for hikers who need extra support.
Cons:
- Heaviest Option: Steel poles are much heavier than aluminum or carbon fiber poles, which can slow you down.
- Rust Risk: If not cared for properly, steel poles might rust in wet conditions.
- Best For: People who need extra support for short hikes or for industrial uses.
By now, you know the basics of trekking pole materials. Aluminum poles are strong and budget-friendly, carbon fiber poles are light and comfy, and steel poles are super tough but heavy. In the next part of this guide, we’ll talk about other features, like length and grip types, that you should think about when choosing trekking poles.
Trekking poles can completely change how you feel about hiking. They make trails easier, your steps lighter, and your hikes way more enjoyable. With the right poles, even the hardest trails can feel like an exciting challenge instead of a tiring chore.
Let’s keep learning so you can pick the perfect poles and enjoy hiking like never before!
Which Material is Best for You?
Choosing the right material for trekking poles depends on your hiking style, the terrain you explore, and what you value most—durability, weight, or budget. Here’s a simple guide:
- If durability and cost matter most: Aluminum poles are your best choice.
- For lightweight comfort: Go for carbon fiber poles.
- Need extra strength for tough terrain: Steel poles are the way to go.
If you’re unsure, ask yourself, “Do I care more about weight, cost, or strength?” Your answer will help you pick the perfect poles.
Length: How to Choose the Right Size
Getting the length of your trekking poles right is super important. Poles that are too long or too short can mess up your balance or make hiking uncomfortable. Let’s learn how to find the best fit for you!
Adjustable vs. Fixed-Length Poles
Before choosing the length, understand the two main types of poles:
Adjustable Poles
- What are they?
- Poles that let you change their length using a locking system.
- Why are they great?
- You can make them shorter or longer depending on the trail. Shorter poles help on uphill climbs, and longer poles give better support on descents.
- Best for: Hikers who explore different terrains or share poles with others.
Fixed-Length Poles
- What are they?
- Poles that come in one set length.
- Why are they great?
- They’re lighter and simpler since they don’t have extra parts.
- Best for: Hikers on flat trails or those who want ultralight gear.
How to Pick the Right Pole Length
Follow these steps to find the right size:
Start with Your Height
Here’s a quick guide to pole lengths:
- Under 5’1” (155 cm): Use poles around 100 cm.
- 5’2” to 5’7” (157–170 cm): Go for poles 105–110 cm.
- 5’8” to 5’11” (173–180 cm): Choose poles 110–120 cm.
- Over 6’ (183 cm+): Look for poles 120–130 cm.
Adjust for Terrain
- Uphill: Make your poles 5–10 cm shorter for better balance.
- Downhill: Lengthen them by 5–10 cm for extra stability.
- Flat Terrain: Use the standard length for your height.
Think About How You’ll Use Them
- If you’ll use poles for activities like skiing or snowshoeing, choose slightly longer ones.
Quick Tips for Adjusting Poles
- Test Before Your Hike: Practice using your poles at home to ensure the length feels right.
- Check the Locks: For adjustable poles, ensure the locks are tight, so they don’t collapse under your weight.
- Mark Your Settings: If you adjust often, mark your favorite lengths for uphill, downhill, and flat terrain.
Why Length Matters
Poles that are too long can strain your shoulders, and poles that are too short can overwork your wrists. The correct length ensures your body weight is evenly spread, making hiking easier and more enjoyable.
- Pro Tip: If you’re not sure, go with adjustable poles. They let you change the length as needed.
Shock Absorption: Is It Worth It?
Shock absorption might sound fancy, but it’s a big deal for making hikes more comfortable, especially on tough trails. Let’s look at why it matters and how it works.
Why Shock Absorption is Helpful
Protects Your Joints
Trekking poles with shock absorption reduce stress on your knees, ankles, and wrists—especially when walking downhill. This is great if you have joint pain or are carrying a heavy backpack.
Makes Long Hikes Easier
Shock absorption dampens the force of each step, so you don’t feel as tired after a long trek.
Prevents Injuries
If you’re prone to wrist or knee pain, shock-absorbing poles can help keep you comfortable and injury-free.
Types of Shock Absorption Systems
Trekking poles use different systems to absorb shock. Here are the most common ones:
Spring-Loaded Systems
- How It Works: A spring inside the pole compresses under pressure to absorb impact.
- Pros: Excellent for reducing strain during steep descents.
- Cons: Adds weight and may need more maintenance.
Adjustable Tension Systems
- How It Works: Lets you control how much shock absorption the poles provide.
- Pros: Customizable for different terrains.
- Cons: More expensive than basic systems.
Combination Systems
- How It Works: Combines fixed shock absorption with adjustable settings.
- Pros: Offers a good balance of stability and comfort.
- Cons: Can feel heavier than simpler designs.
When to Use Shock Absorbing Poles
Shock absorption isn’t always necessary, but it’s a lifesaver in certain situations:
Perfect for:
- Long hikes with steep descents.
- Rough, uneven trails.
- Heavy backpack loads.
- Trekkers with knee or joint problems.
Not needed for:
- Flat or easy terrain where impact is minimal.
Choosing the Right Shock Absorption
Ask yourself:
- Will I be hiking on steep or rocky trails?
- Do I have joint issues or carry heavy packs?
- Do I want extra comfort for long hikes?
If you answered yes to these, consider poles with shock absorption. If not, regular poles might be just fine.
Final Thoughts
Picking the right trekking poles is about understanding your needs and the trails you love to explore. Whether you focus on material, length, or shock absorption, there’s a perfect set of poles out there for you. With the right poles in hand, every step on the trail will feel easier, more stable, and way more enjoyable. Happy hiking!
Pros and Cons of Shock-Absorbing Trekking Poles
| Pros | Cons |
| Reduces joint strain on descents. | Slightly heavier than non-absorbing poles. |
| Adds comfort for long-distance treks. | Can be pricier than standard poles. |
| Beneficial for hikers with joint issues. | May require occasional maintenance. |
Are Shock-Absorbing Poles Worth It?
The answer depends on your needs and where you’re hiking. If you often hike on rocky or steep trails, carry a heavy backpack, or have sore joints, trekking poles with shock absorption can make a big difference. These poles help reduce stress on your knees and wrists, making your hikes smoother and more enjoyable. On the other hand, if you prefer lighter gear or mostly walk on easier trails, regular trekking poles without shock absorption might be all you need.
Pro Tip: Some trekking poles let you turn the shock-absorption feature on or off. This gives you the flexibility to use it only when needed, like on downhill trails or rough terrain.
Grips and Straps: The Keys to Comfort and Control
When choosing trekking poles, don’t just focus on the pole material or fancy features like shock absorption. The grips and straps are just as important because they directly affect your comfort. After all, your hands will be holding onto these poles for hours!
Here’s a breakdown to help you pick the best grips and straps for your hikes.
Types of Trekking Pole Grips
The grip is the part of the pole where your hands go. They come in different materials, each with unique benefits depending on the weather, your hand size, and how long you’ll be hiking.
Cork Grips
- What They’re Like: Cork grips feel natural and soft. Over time, they mold to the shape of your hands for a custom fit.
- Best For: Long hikes and warm weather.
- Pros:
- Super comfy and ergonomic.
- Absorb sweat, keeping your hands dry.
- Last through different weather conditions.
- Cons:
- Slightly heavier than foam or rubber grips.
- Can more expensive.
Foam Grips
- What They’re Like: Foam grips are soft, lightweight, and spongy, which makes them great for soaking up sweat.
- Best For: Hikers with sweaty hands or those hiking in hot, dry climates.
- Pros:
- Lightweight and cushy.
- Soak up sweat really well.
- Affordable.
- Cons:
- May wear out faster, especially with lots of sweat.
- Can get damaged in wet conditions.
Rubber Grips
- What They’re Like: Rubber grips are sturdy and give a firm hold. They work well in cold or wet weather.
- Best For: Hikers in colder climates or those who wear gloves.
- Pros:
- Durable and long-lasting.
- Keep your hands warm in cold weather.
- Budget-friendly.
- Cons:
- Can feel sticky or uncomfortable in hot weather.
- Don’t absorb sweat, which might make your hands slippery.
Types of Trekking Pole Straps
Straps are the loops attached to the grips. They help you hold onto the poles securely and reduce strain on your hands and wrists.
Standard Straps
- What They’re Like: Simple and adjustable loops that fit around your wrist.
- Best For: Short hikes or easy trails.
- Pros:
- Lightweight and easy to use.
- Cons:
- May feel rough or uncomfortable during longer hikes.
Padded Straps
- What They’re Like: These straps have extra cushioning, making them more comfortable for extended use.
- Best For: Long-distance hikes or trails with lots of ups and downs.
- Pros:
- Prevent chafing.
- Reduce wrist strain.
- Cons:
- A bit bulkier.
Ergonomic Straps
- What They’re Like: These straps are specially designed to match the natural movement of your hands and wrists.
- Best For: Advanced hikers or anyone who wants maximum comfort and control.
- Pros:
- Provide excellent support and control.
- Reduce wrist strain even on challenging trails.
- Cons:
- More expensive.
How to Pick the Best Grips and Straps
Choosing the right combination depends on your hiking style, weather, and how much you prioritize comfort.
Think About Your Hikes
- For long treks, cork or foam grips with padded straps will keep your hands comfortable.
- For cold weather, rubber grips with ergonomic straps are better since they’ll keep your hands warm and secure.
Test Them Out
Grips should fit snugly in your hand without making your fingers feel cramped or strained.
Straps should feel secure but not too tight—they should allow natural movement.
Consider Durability
- Cork grips are low-maintenance and last a long time.
- Foam grips need more care since they can wear out quickly if exposed to too much sweat or water.
Tips for Using Grips and Straps
To get the most out of your trekking pole grips and straps, keep these tips in mind:
- Learn the Right Strap Technique:
- Slip your hand up through the bottom of the strap, then grab the pole grip. This way, the strap supports some of your weight, reducing hand fatigue.
- Keep Grips Clean and Dry:
- If your grips get wet or sweaty, dry them overnight. This will help them last longer and stay comfortable.
- Adjust Straps Before Each Hike:
- Make sure the straps fit snugly but don’t cut off circulation. A good fit prevents blisters and keeps your hands comfy during long hikes.
Wrapping It Up
When it comes to trekking poles, small details like grips and straps can make a big difference in your hiking experience. Whether you’re tackling a tough mountain trail or enjoying a gentle walk, the right grips and straps will keep you comfortable and in control. Take your time to choose what feels best for your hands and hiking style—you’ll thank yourself after a long day on the trail!
Pros and Cons of Different Grips and Straps
| Grip Type | Pros | Cons |
| Cork | Comfortable, sweat-wicking, durable | Heavier and pricier |
| Foam | Lightweight, affordable, absorbs sweat | Wears out faster, less durable |
| Rubber | Durable, insulates in cold weather | Uncomfortable in hot conditions |
| Strap Type | Pros | Cons |
| Standard | Lightweight, adjustable | Minimal padding |
| Padded | Comfortable, reduces chafing | Slightly bulkier |
| Ergonomic | Superior control and wrist comfort | Expensive |
By choosing the right grips and straps for your trekking poles, you can elevate your hiking experience, ensuring both comfort and performance on any terrain.
Pro Tip: Test different grips and straps in-store or during a short hike before committing to a purchase.
Top Trekking Pole Brands and Models: The Best in the Market
If you’re looking for trekking poles, knowing which brands are reliable can make your choice a lot easier. Each brand has unique features for different needs, whether you want something lightweight, adjustable, or extra comfortable. Let’s take a closer look at the best trekking pole brands and their top models.
Black Diamond
Black Diamond is a big name in outdoor gear. They make strong, innovative, and durable trekking poles for all kinds of hikers, from beginners to mountain experts.
- Top Model: Black Diamond Trail Ergo Cork
- Features:
- Ergonomic cork grip that feels great in your hands.
- FlickLock system for quick and easy length changes.
- Sturdy aluminum material for long-lasting use.
- Best For: Hikers who want comfort, durability, and good value.
- Why It Stands Out: The cork grip molds to your hands over time, making it super comfy for long hikes.
- Other Great Models:
- Black Diamond Alpine Carbon Z – Lightweight poles made from carbon fiber.
- Black Diamond Distance Z – Collapsible poles for easy storage.
LEKI
LEKI is well-known for its smart designs and comfortable trekking poles. Both pros and casual hikers love them.
- Top Model: LEKI Micro Vario Carbon
- Features:
- Carbon fiber makes it lightweight but strong.
- SpeedLock+ system for quick adjustments.
- Aergon grips for extra comfort and control.
- Best For: Experienced hikers who want advanced features.
- Why It Stands Out: It folds up small, so it’s easy to pack and carry.
- Other Great Models:
- LEKI Corklite – Comes with high-quality cork grips.
- LEKI Makalu Lite – A lightweight aluminum pole.
Komperdell
This Austrian brand is known for mixing excellent craftsmanship with modern technology.
- Top Model: Komperdell Carbon C3 Air Shock
- Features:
- Built-in shock absorption to protect your joints.
- Lightweight carbon material for easier hikes.
- Extended foam grips, great for climbing steep trails.
- Best For: Hikers who want less impact on their joints.
- Why It Stands Out: Its shock absorption system is great for long, rough treks.
- Other Great Models:
- Komperdell Ridgehiker Cork Power Lock – Tough poles with cork grips.
- Komperdell Explorer Compact Power Lock – Compact and easy to carry.
Cascade Mountain Tech
This brand offers high-quality trekking poles at an affordable price, making them perfect for beginners.
- Top Model: Cascade Mountain Tech Carbon Fiber Trekking Poles
- Features:
- Lightweight carbon fiber for easier trekking.
- Quick-lock system for simple adjustments.
- Cork grips for a comfortable hold.
- Best For: Hikers on a budget who want good quality.
- Why It Stands Out: These poles have great features at an unbeatable price.
- Other Great Models:
- Cascade Aluminum Quick Lock Poles – Durable and affordable poles.
MSR (Mountain Safety Research)
MSR is famous for making trekking poles tough enough for extreme weather and rough terrain.
- Top Model: MSR Dynalock Ascent Carbon
- Features:
- Durable carbon fiber construction.
- DynaLock adjustment system for a secure fit.
- Ultra-light design for high performance.
- Best For: Serious hikers and mountaineers.
- Why It Stands Out: It’s designed for tough alpine and backcountry hikes.
- Other Great Models:
- MSR Dynalock Explore – Adjustable and versatile poles.
Foxelli
Foxelli makes trekking poles that are both affordable and packed with useful features. They are a top choice for casual hikers.
- Top Model: Foxelli Carbon Fiber Trekking Poles
- Features:
- Super lightweight carbon fiber design.
- Comfortable cork grips with extended foam for flexibility.
- Adjustable locking system for quick changes.
- Best For: Beginners and intermediate hikers on a budget.
- Why It Stands Out: You get high-quality features without spending a lot.
- Other Great Models:
- Foxelli Aluminum Trekking Poles – Sturdy and budget-friendly.
TrailBuddy
TrailBuddy makes affordable trekking poles for beginner and intermediate hikers. They focus on keeping their poles functional and simple to use.
- Top Model: TrailBuddy Adjustable Aluminum Poles
- Features:
- Strong aluminum material for durability.
- Quick-lock system for fast adjustments.
- Ergonomic cork grips for comfort.
- Best For: Hikers looking for good quality at a reasonable price.
- Why It Stands Out: These poles are durable, easy to use, and affordable.
Final Thoughts
Choosing the right trekking poles depends on your needs. If you want lightweight poles, brands like LEKI and MSR are great. If you’re on a budget, check out Cascade Mountain Tech or Foxelli. For top-notch comfort and durability, you can’t go wrong with Black Diamond or Komperdell.
No matter which brand you pick, the most important thing is to find trekking poles that feel good in your hands, are easy to adjust, and match your hiking style. Happy trekking!
| Brand | Top Model | Key Features | Best For |
| Black Diamond | Trail Ergo Cork | Durable aluminum, ergonomic cork grips | All-around hikers |
| LEKI | Micro Vario Carbon | Lightweight carbon, advanced locking system | Experienced hikers |
| Komperdell | Carbon C3 Air Shock | Shock absorption, extended grips | Rugged terrains |
| Cascade Mountain Tech | Carbon Fiber Poles | Budget-friendly, cork grips | Budget-conscious hikers |
| MSR | Dynalock Ascent Carbon | Ultra-lightweight, durable design | Mountaineers and trekkers |
| Foxelli | Carbon Fiber Poles | Lightweight, affordable | Beginners and casual hikers |
| TrailBuddy | Adjustable Aluminum Poles | Durable, affordable | Beginner to intermediate hikers |
By exploring these trusted brands and their standout models, you can make an informed choice and invest in trekking poles that suit your hiking style and needs.
Pro Tip: Visit outdoor stores to try out different models or read user reviews to understand real-world performance.
Tips for Using Trekking Poles: Easy Ways to Stay Safe and Hike Like a Pro
Using trekking poles the right way can make hiking much easier and more fun. They help you keep your balance, save energy, and improve your posture. Here are some easy tips to use your poles safely and properly for the best hiking experience.
Set the Length Right
Getting the right pole length is super important for comfort.
- On Flat Ground: Adjust your poles so your elbows make a 90-degree angle when holding the poles upright.
- Going Uphill: Make the poles shorter so you can climb easier.
- Going Downhill: Lengthen the poles to stay steady.
Pro Tip: Most trekking poles have markings to help you adjust them. Practice setting the length before your hike.
Hold the Poles Correctly
How you grip the poles matters a lot—it saves your hands and wrists from getting tired.
- Using Straps: Put your hand through the strap from below and then grab the handle. The strap should help support your weight.
- Gripping: Hold the handle firmly but not too tightly, so your hands don’t get sore.
- Safety Tip: Don’t take off the straps when hiking down steep slopes—it helps you keep control.
Match Your Steps with the Poles
Moving your poles in sync with your steps improves balance and makes walking easier.
- Flat Trails: Move your left pole forward when your right foot steps forward, and switch.
- Climbing Uphill: Push down on the poles to help lift yourself up and take some pressure off your legs.
- Going Downhill: Place both poles in front of you for extra balance and to protect your knees.
Tip: Practice on short hikes to get used to the rhythm before a long trek.
Place the Poles in the Right Spot
- Flat Ground: Put the poles slightly in front of you, angling them backward to help push you forward.
- Rocky or Uneven Paths: Place your poles carefully to keep them from slipping or getting stuck between rocks.
- Mud or Snow: Attach baskets to the poles to stop them from sinking too deep.
Pro Tip: Always test the ground with your poles before putting your full weight on them.
Stay Safe with Your Poles
- Check the Locks: Make sure the poles are locked securely before you start hiking.
- Don’t Overload Them: Trekking poles are for balance, not for holding all your weight.
- Watch the Trail: Don’t place your poles too close to the edge of the trail or on loose dirt.
Change How You Use Them Based on the Trail
- Use Foam Grips for Steep Climbs: If your poles have extended foam grips, hold them lower to stay in control.
- Stow Poles When Not Needed: If the trail requires climbing or scrambling, attach your poles to your backpack.
- Switch Tips: Use rubber tips for paved paths and carbide tips for rough trails.
Take Care of Your Poles
- After Hiking: Clean your poles to remove dirt and water so they don’t rust.
- Check Before Using: Look at the locks, tips, and straps to make sure they aren’t damaged.
- Store Properly: Collapse your poles and keep them in a dry place to make them last longer.
FAQs About Trekking Poles
Q: How do I stop my wrists from hurting while using trekking poles?
Use the straps to support your weight and avoid gripping too tightly.
Q: Can I use trekking poles in any weather?
Yes! Many poles have different tips and baskets for mud, snow, and dry trails.
Q: Should I use trekking poles for crossing rivers?
Definitely! They help you balance on slippery rocks.
Conclusion: Make the Most of Your Trekking Poles
Trekking poles aren’t just for show—they make hiking easier and safer. Here’s what we covered:
- How to pick the right trekking poles by looking at features like material, length, and grips.
- The best brands and models for different hiking needs.
- Tips to use your poles effectively, whether climbing, descending, or hiking flat trails.
We Want to Hear from You!
Have you used trekking poles? Share your favorite brands, tips, or questions in the comments. We’d love to help!
Final Thoughts
With the right trekking poles and some practice, hiking becomes more fun and less tiring. Whether you’re walking on a gentle trail or climbing a mountain, trekking poles help you stay steady and confident. So grab your gear and get ready for an amazing adventure!
Happy hiking!
I have had the privilege of leading countless trekkers through some of the world’s most iconic routes, including the Everest Base Camp Trek and Annapurna Base Camp Trek. Every trek is not just a physical journey; it’s an opportunity to connect with nature, immerse ourselves in rich cultures, and create lasting memories.
I believe that trekking is about more than just reaching a destination; it’s about the stories we share along the way. My fluency in Spanish, English, Hindi, and even some Japanese and Korean allows me to connect with trekkers from all walks of life, ensuring that every journey is tailored to your unique desires and needs.